Thanks to everyone for entering and playing along with my giveaway :) I've randomly picked a winner (using the highly technical eenie meenie mighny moh method. It seemed only natural considering the prize).
And Lori, you're it :D
If you could please send me your details I'll send you some vintage magazine loveliness.
Sunday, July 17, 2011
Tuesday, July 12, 2011
Ooshka babushka
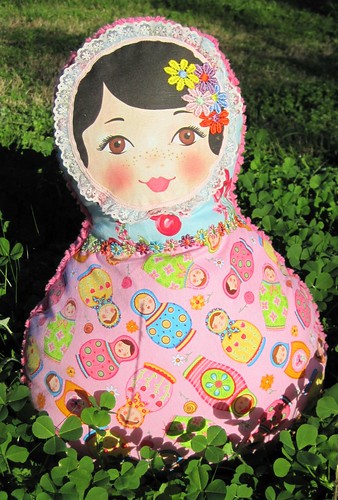
I couldn't help myself.....I kept seeing all these gorgeous Ooshka's being made in blogland and had to join in the fun!
The fabric choices were not my own. I would have picked a bunch of florals and personally I think it's a bit of Ooshka overkill but hey, beauty is in the eye of the beholder (and in this case the receiver). Besides, I am not the style police lol.
I did make a little alteration to the pattern and made this Ooshka a bit wider. I felt she needed to be a bit more cuddly and I'm happy with her width but next time I may make her longer too. I can't ever seem to make anything without altering it in some way. I've tried, but it's no good. I can't help myself.
I had to add the lace that frames her face as the face panel was fraying something terrible and I could see it would come off eventually. I also had to add the flowers as someone took to dollies face with a biro.....but all is well as the flowers add a cute touch.
Sunday, July 10, 2011
A giveaway
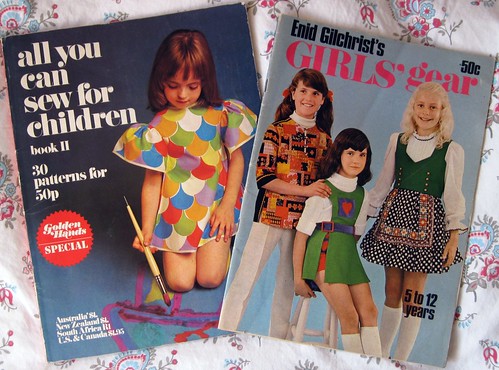
Earlier this year I said I wanted my aim for the year to be more giving and I have been able to achieve that in my real life but I have neglected my bloggy life, so when my MIL arrived with a bag of books for me and I found these two in it, which I already own, I knew I wanted to have another giveaway :)
Both of these books are lovely and full or all sorts of retro cuteness, so I hope someone will love them and get some use out of them.
To enter please leave me a comment. No need to be a follower, no need to post on your own blog. No need to stand on your head an sing the national anthem either ;)
Sigh.....I do struggle with this photo uploading thing. I forgot to select the correct size for the blog and now part of the photo is cropped and I'm having a hard time working out how to go back and fix it lol, so just to let you know the Enid is for sizes 5 to 12 years.
Edited to add that I'll draw this on Sunday :)
Sweet and simple
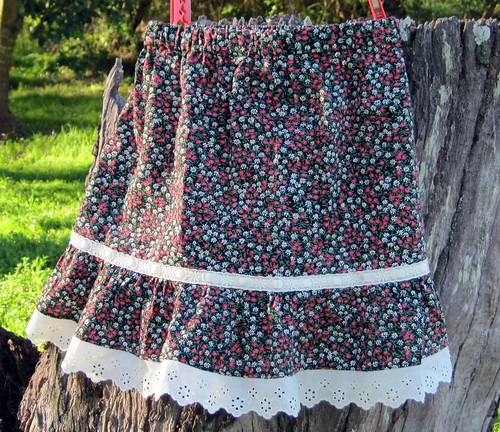
This was one of those easy little projects that was just a joy to create. No pattern required. All fabric and trims from stash. What's not to love?
Should there be anyone wishing to make their own little skirt like this it's just a matter of...
1 - measure your little one around the hips, add 15cm and that is the width of the upper skirt. Measure from waist to knees, add 3cm for the waistband casing and 1cm for the seam where the upper skirt joins the lower skirt and that's your length.
2 - cut a ruffle strip however long you want it and twice the width of the upper skirt.
3 - overlock your chosen trim to the bottom strip of the skirt, press the seam up and topstitch it down. Gather the upper edge of this strip so that it is the same width as the upper skirt.
4 - sew the ruffled strip to the upper skirt, overlock and press the seam up toward the top of the skirt. Lay your trim over the seam and stitch down. My trim is a broderie insertion lace and I stitched that down first then threaded the ribbon through using a safetey pin......note to self must get a bodkin!!
5 - overlock the top of the skirt.
6 - sew up the side seams.
7 - turn down the waistband casing and stitch leaving a small opening for the elastic...then thread the elastic, sew up the ends and sew closed the opening (don't forget to try the skirt on before you close up the opening - I've been caught out that way a few times and had to unpick).
And that's it!!
Should anyone have any questions or if any of these steps are unclear please feel free to leave a comment and ask.
Tuesday, July 5, 2011
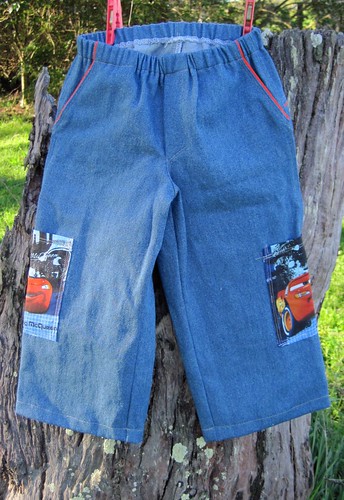
Kachow
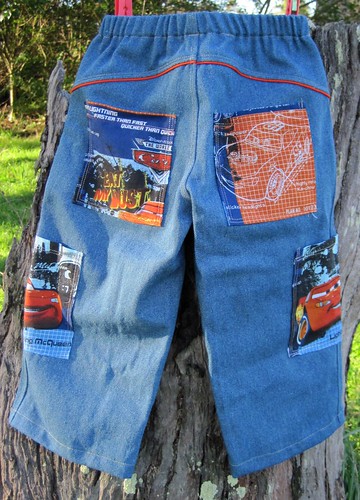
These are for a little Lightning McQueen fan :)
I used denim from stash and the cars print is from curtain fabric from Spotlight. I also added a little piping to the seams to break up the denim and add some interest. I used an Otto pattern and I have to say all the pieces went together like a dream.....
Vintage Curtains.
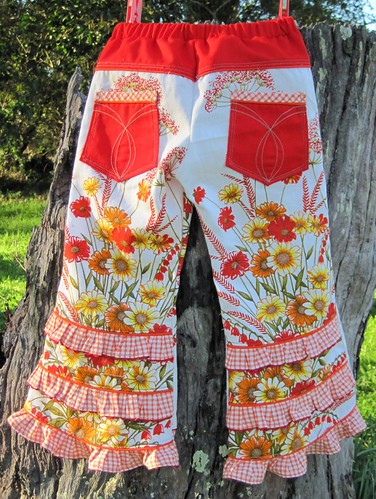
I found a set of kitchen curtains in the salvos a long time ago and fell in love with the bright print. Many months later I came across the orange gingham in the same store and suddenly realised what I wanted to make out of them.....Kim pants with the little frills on the back.
I'm very happy with how these turned out, though of course now that I look at them I realise they'd look so much better with a false fly or a zip fly (scary!!), some belt loops and the waist band in the white curtain fabric. There wasn't enough to do the waist band in the curtain fabric though as I was only just able to get the front of the pants out of them and for that I had to unpick the curtain hem and leave off the gathered section that the Kim pants usually have.
Subscribe to:
Comments (Atom)